Thursday, February 13, 2014

Yarn Ply Variations and Hook Sizes


I've been crocheting with 2 different brands of yarn recently and both are double knit, AU 8 ply.
Both are quality brands, but differ in thickness, which forces me to use a different size hook.

Here I am working on the crown of a baby hat
I used a 4 mm hook on the left and 3.5mm on the right
 The yarn on the left is slightly thicker that the yarn on the right, so I adjusted the hook to suit the yarn
Yarn hook and ply does make a big difference when making a wearable item from specific instructions.
 Take one of my own patterns for example.
Simple Crochet Sweater Size 2
Free Crochet Pattern 
I used a 4mm hook and dk yarn (the thicker dk) making the sweater below.
Debbie Sealock Hughes writes
Here's your pattern for the free crochet pattern size 2 simple crochet pattern. I had a thicker yarn so I used a size I hook and it worked beautifully and will fit my 8 year old granddaughter. It is a beautiful pattern and very easy. Took me about 7 hours to complete. Thanks for the pattern!
With some experience on hand, we can up size and down size a pattern by switching hook sizes and yarn ply's.
I know many do with the patterns I write and it's fun to see!

Wednesday, February 12, 2014

Little Petals-Baby Beanie-Free Crochet Pattern


Little Petals-Baby Beanie-Free Crochet Pattern

 A decorative 20 row baby beanie

Introduction: This pattern resembles the petals of a flower. You will work 1 row of shell st’s with a sc in between each shell st. The next row consists of, the fpdc, some chain st’s and sc’s. If you are confident with these st’s you will have no problem making these decorative flower petals. The pattern does tend to firm up a bit, so I would suggest to go up, half a hook size when working the pattern rows.
This pattern is an 8 stitch repeat; it can be used with 48, 64, 72, stitch count.


To fit: Newborn
Measurements approx: Head Circumference 13 inches, hat height approx 5.5 inches

Please note, by using a smaller or larger hook, you can make a smaller or larger beanie

Hook size: 4mm to 4.5mm US G/6 (see introduction)
Yarn: 8 ply approx 50 gm’s US DK/Medium.
I used, double knit Special, by Stylecraft
US crochet terms used
Skill level: beginner ++
Tension: medium
Time: approx 2 hours

Stitches used:
Sl st=slip stitch
Ch=chain
Sc = single crochet
Hdc= half double crochet
Dc =double crochet
Fpdc=front post double crochet
Special stitch: Shell st = (3 dc, ch 3, 3 dc)

Please note! The beginning ch 1 and ch 2 of every rnd is not counted as a st.

BEGIN:
Chain 4, sl st to first ch to form a ring. Or use a magic ring.

Row 1, ch 1, work 12 hdc into ring, sl st to join in the 1st hdc (you will join this way on every round)

(Increase in every st)
Row 2, ch 1, work 2 hdc into each hdc to end, sl st to join (24 hdc)

(Increase in every 3rd st)
Row 3, ch 1, *work 1 hdc into the next 2 hdc, work 2 hdc into the next* repeat from *to* to end, sl st to join (32 hdc)

(Increase in every 4th st)
Row 4, ch 1, *work 1 hdc into the next 3 hdc, work 2 hdc into the next* repeat from *to* to end, sl st to join (40 hdc)

(Increase in every 5th st)
Row 5, ch 1, *work 1 hdc into the next 4 hdc, work 2 hdc into the next* repeat from *to* to end, sl st to join (48 hdc)

(Increase in every 6th st)
Row 6, ch 1, *work 1 hdc into the next 5 hdc, work 2 hdc into the next* repeat from *to* to end, sl st to join (56 hdc)

Row 7, ch 2, work 1 dc into same space as join,  work 1 dc in each st to end, sl st to join (56 dc)

Begin Pattern Rows (change to larger hook, see introduction)
Row1, ch 1, work 1 sc in same place as join, skip 3 st’s, work a shell st in next st, skip 3 st’s,* work 1 sc in next, skip 3 st’s, work a shell st in next st, skip 3 st’s*, repeat from *to* to end, sl st into beginning sc (7 shells, 7 sc’s)
Row 2, ch 2, work 1 dc in same space as join, work 1 fpdc around the 1st and 3rd, dc’s of the shell st, ch 3, work 1 sc in the ch 3 space of the shell st, ch 3, work 1 fpdc around the 4th and 6th dc of the same shell st,* work 1 fpdc around the 1st and 3rd, dc’s of the next shell st, ch 3, work 1 sc in the ch 3 space of the shell st, ch 3, work 1 fpdc around the 4th and 6th dc of the same shell st,* repeat from *to* to end, sl st into the beginning dc of the round
Row 3, ch 1, work 1 sc in same place as join, work a shell st in same space as join, work 1 sc in the next sc, *work a shell st in the space between the next 2nd and 3rd fpdc, work 1 sc in the next sc*, repeat from *to* to end, sl st to join in the ch 3 space of the 1st shell of this round
Row 4, work 1 sc in same space as join, ch 3, work 1 fpdc around the next dc, skip 1 dc, work 1 fpdc around the next dc, *work 1 fpdc around the 1st and 3rd, dc’s of the next shell st, ch 3, work 1 sc in the ch 3 space of the shell st, ch 3, work 1 fpdc around the 4th and 6th dc of the same shell st*, repeat from *to* to end, work 1 fpdc around the 1st and 3rd, dc’s of the very first shell st of this round, sl st join in the 1st sc of this round
Row 5, ch 1, work 1 sc in same space as join, work a shell st in the space between the next 2nd and 3rd fpdc, *work 1 sc in the next sc, work a shell st in the space between the next 2nd and 3rd fpdc* repeat from *to* to end, sl st into the 1 st sc of this round
Row 6, repeat row 2
Row 7, repeat row 3
Row 8, repeat row 4
Row 9, repeat row 5
Row 10, repeat row 2
Row 11, repeat row 3

My hat is measuring approx 5 inches long and I am ready to do the hat edge, in saying that I think the hat looks pretty ending on a shell stitch row, you can choose to finish on a shell stitch row at the desired length of the hat you need (just continue pattern sequence), or use the following instructions for a simple rib edging for the hat.
Begin Hat Edge (reduce hook size)
Row 1, ch 2, work 2 sc in same space as join, work 1 dc in each of the next 3 dc, *work 1 dc in the sc, work 1 dc in each of the next 3 dc, work 1 hdc in the ch 3 space, work 1 dc in each of the next 3 dc,* repeat from *to* to end,  work 1 dc in the final sc of this round, sl st to the top of the ch 2, (54 st’s + 1 ch 2, if you started with 56 hdc’s).
Once again you can finish your hat here or go on to the next rounds
Row 2, ch 2,*work 1 dc in next st, work 1 fpdc around the next st*, repeat from *to* to end, sl st into top of ch 2

My hat is long enough now, but if you want yours longer, 
repeat row 2
I am going to finish off my hat with 1 more row.
By working 1 ch, then 1 hdc in each stitch of the round, sl st to join finish off and weave in ends
(This last hdc row can prevent curling/stretching of the hat edge).

If you like this pattern, you will definitely like this one too check it out!
Little Fans Down Under

Free Pattern Courtesy Of Cat Wood
Aka, Cats-Rockin-Crochet.
 2014.

You can sell your items made from this pattern
I’d love to see this pattern used for charity use
Please link back to this pattern if you use it

Tuesday, February 11, 2014

Fans Down Under-Free Crochet Pattern-Adult Size


Fans Down Under-Free Crochet Pattern-Adult Size


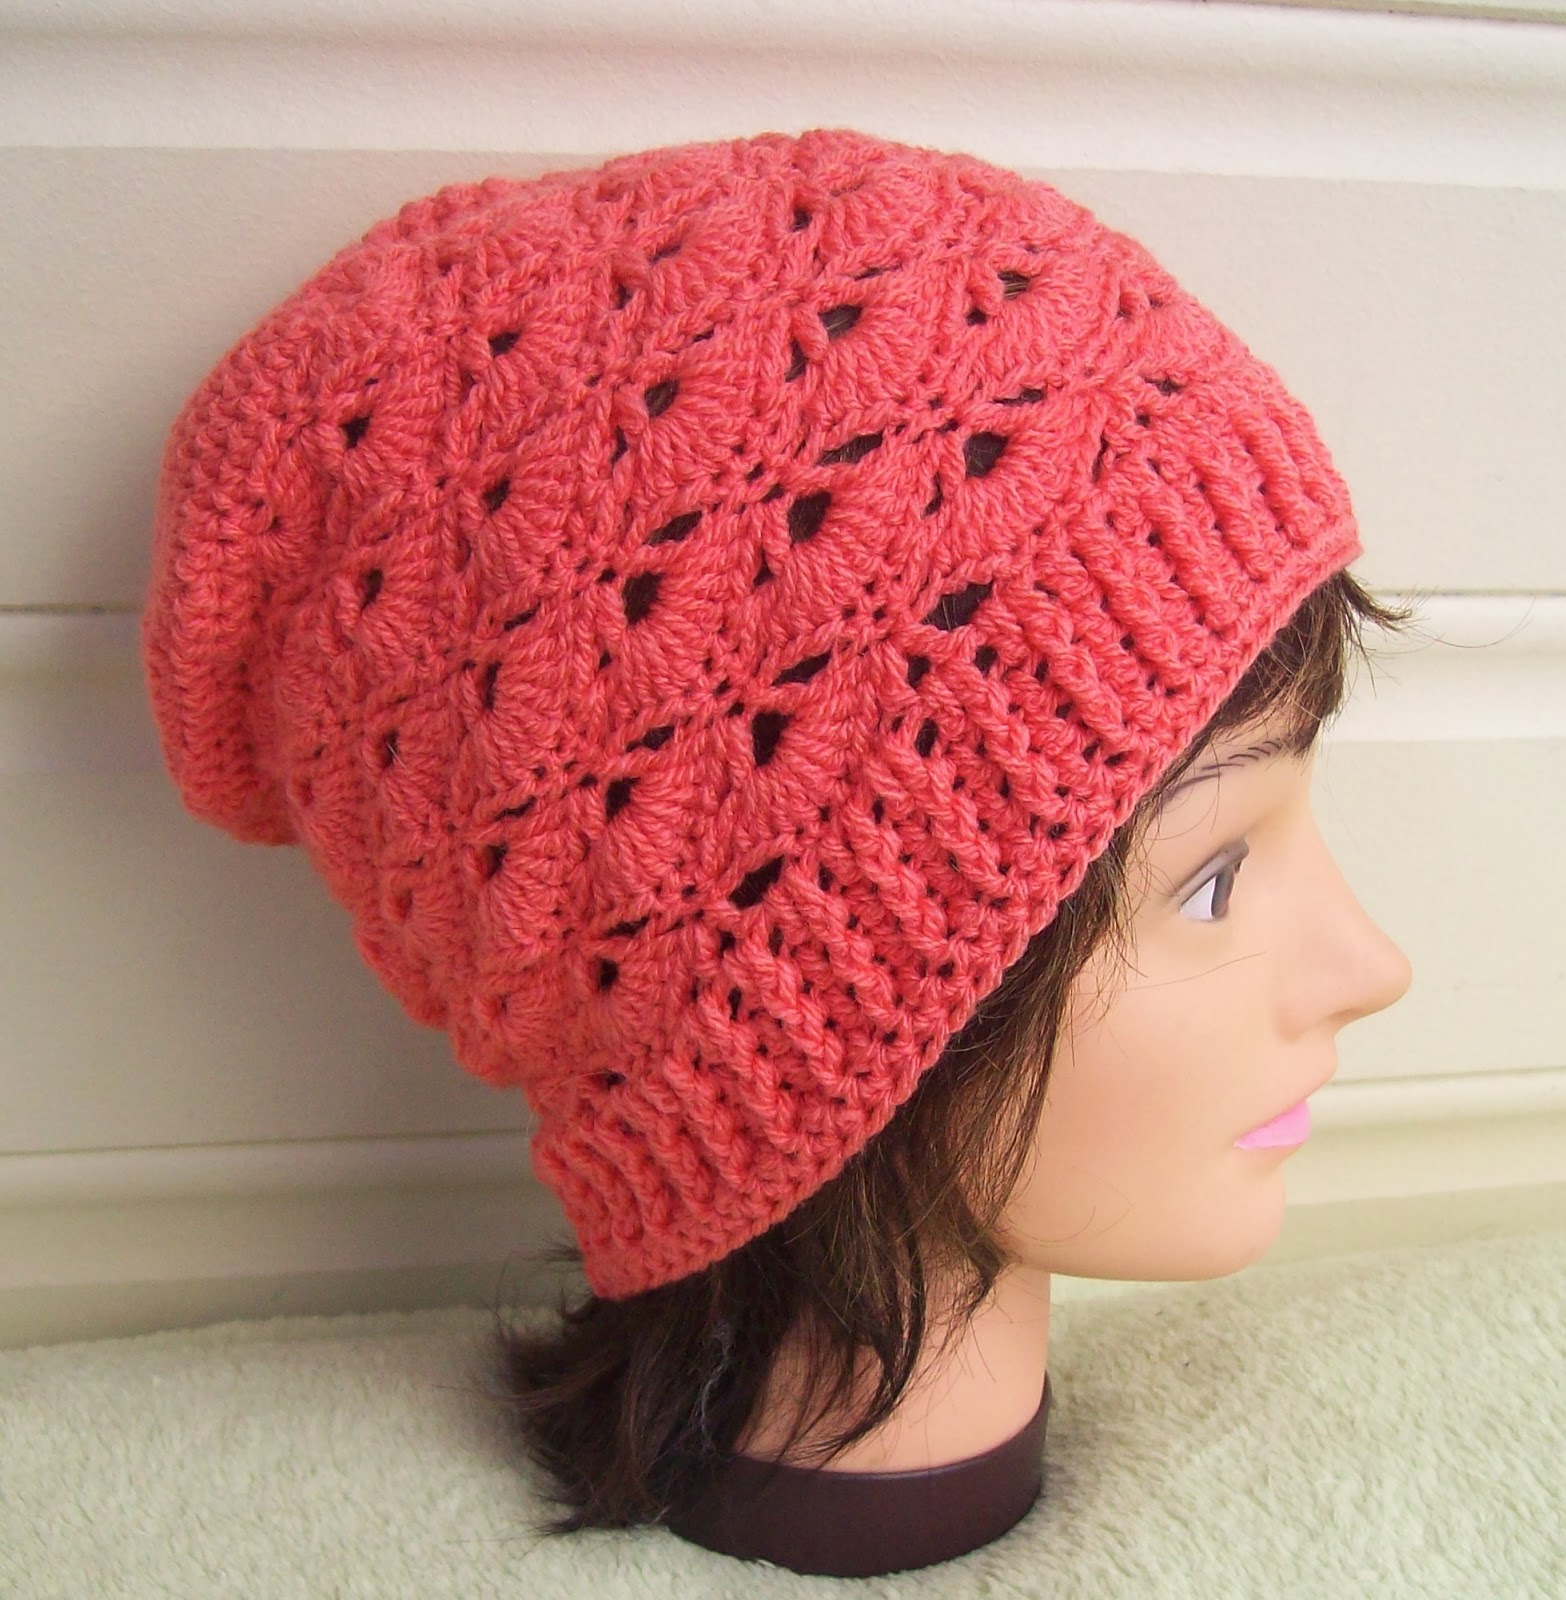
A decorative Beanie, Hat, Beret or Slouch


For Baby Version Free Crochet Pattern
For printer friendly version free crochet pattern no pictures. 

Introduction: With clever placements of the V stitch and 9 dc’s all in a row, a few sc’s and ch’s thrown in together, gives this pretty little stitch pattern a big tick. You will need a bit of concentration to begin with, but the pattern does repeat it’s self so it will become repetitive.


To fit: Adult, please read sizing guidelines supplied after row 8 of the crown and again at row 16 of the pattern rows.


Hook size: 3.5mm to 5.0mm, US G/6

Yarn: 8 ply approx 150 gm’s US DK/Medium.

US crochet terms used

Skill level: beginner +

Tension: medium

Time: approx 2 hours


Stitches used:

Sl st=slip stitch

Ch=chain

Sc = single crochet

Hdc= half double crochet

Dc =double crochet

Fpdc=front post double crochet

V st= (dc, ch 1, dc)


V stitch: The V stitch is (1 dc, ch 1, 1 dc), worked into the st indicated by the pattern


We will be working with a hdc crown, this will give a longer pattern length within the hat. You are welcome to use dc’s instead.


Please note! The beginning ch 1 and ch 2 of every rnd is not counted as a st.


BEGIN:

Chain 4, sl st to first ch to form a ring. Or use a magic ring.


Row 1, ch 1, work 12 hdc into ring, sl st to join in the 1st hdc (you will join this way on every round)


(Increase in every st)

Row 2, ch 1, work 2 hdc into each hdc to end, sl st to join (24 hdc)


(Increase in every 3rd st)
Row 3, ch 1, *work 1 hdc into the next 2 hdc, work 2 hdc into the next* repeat from *to* to end, sl st to join (32 hdc)


(Increase in every 4th st)

Row 4, ch 1, *work 1 hdc into the next 3 hdc, work 2 hdc into the next* repeat from *to* to end, sl st to join (40 hdc)


(Increase in every 5th st)

Row 5, ch 1, *work 1 hdc into the next 4 hdc, work 2 hdc into the next* repeat from *to* to end, sl st to join (48 hdc)


(Increase in every 6th st)

Row 6, ch 1, *work 1 hdc into the next 5 hdc, work 2 hdc into the next* repeat from *to* to end, sl st to join (56 hdc)


Row 7, ch 1, *work 1 hdc into the next 6 hdc, work 2 hdc into the next* repeat from *to* to end, sl st to join (64 hdc)


Row 8, ch 1, *work 1 hdc into the next 7 hdc, work 2 hdc into the next* repeat from *to* to end, sl st to join (72 hdc)


This may be a good time for you to measure your crown.

I am using a 3.5 mm hook and an 8 ply yarn which is a little on the thin side and looks nicer if I use the 3.5 mm hook with it.

My crown, measures 17 inches around and 5 inches across, it is too small for an adult hat (it would fit a child at this size).

If your crown is larger you can stop increases here.

Approx, 18.5 inches for small adult, approx 21 inches for medium to large adult hat.

If you have the correct fit now, just work 1 hdc in each st around and join, and then go onto the pattern rounds.

You also have the option to increase from 88 st’s to 96 st’s, for a lovely beret/slouch, but these extra st’s will need to be decreased prior to the hat edging. Just follow the same formula above for the extra increases.


Row 9, ch 1, *work 1 hdc into the next 8 hdc, work 2 hdc into the next* repeat from *to* to end, sl st to join (80 hdc)


My crown is now approx 18.5 inches around and 6 inches wide


Row 10, for the 80 hdc round, work 1 hdc in each st to end and sl st to join (80 hdc)


Begin Pattern Rows


Row 1, Ch 1, work 1 sc in same space as join, skip 3 st’s, work 9 dc’s in next st, skip 3 st’s,* work 1 sc in next st, skip 3 st’s, work 9 dc in next st, skip 3 st’s,* repeat from *to* to end, sl st to join in beginning sc, (10 sc, 10 groups of 9 dc, or 1 less of each when using 72 dc crown)


Row2, Ch 4, work 1 dc in same space as ch 4, ch 1, work 1 sc in the 4th, 5th and 6th dc of the 9 dc group, ch 1,* work a V st (V st =1dc, ch1, 1dc) in the sc, ch 1, work 1 sc in the 4th, 5th and 6th dc of the 9 dc group, ch 1,* repeat from *to* to end, sl st into the space between the beginning ch 4 and 1 dc (10 groups of 3 sc, 10 V’s or 1 less of each when using 72 dc crown)


Row 3, Ch 3, work 4 dc in same space as join, skip 1 sc, work 1 sc in next sc, *work 9 dc in the V st space, skip 1 sc, work 1 sc in next sc,* repeat from *to* to end, work 4 dc in same space as the beginning (ch 3 and 4 dc) sl st into the top of the ch 3


Row 4, Ch 1, work 1 sc in same space as ch 1, work 1 sc in next dc, ch 1, work a V st in the next sc, ch 1,*work 1 sc in the 4th, 5th and 6th dc of the 9 dc group, ch 1, work a V st in the next sc, ch 1*, repeat from *to* to end, skip 3 dc, work 1 sc  in 4th dc, sl st into the 1st sc of this round, (30 sc, 10 V st’s)


Row 5, Ch 1, work 1 sc in same space as join, work 9 dc in the V st space, *skip 1 sc, work 1 sc in next sc, work 9 dc in the V st space,* repeat from *to* to end, sl st into the first sc of this round (10 sc, 10 groups of 9 dc)


Row 6, Repeat row 2

Row 7, Repeat row 3

Row 8, Repeat row 4

Row 9, Repeat row 5

Row 10, Repeat row 2

Row 11, Repeat row 3

Row 12, Repeat row 4

Row 13, Repeat row 5

Row 14, Repeat row 2

Row 15, Repeat row 3

Row 16, Repeat row 4


Once again take the time to measure your hat, if you want it longer repeat more pattern rows or make a longer ribbed edging as per following instructions. Just ensure you end with a row that has the V st in it.

My hat measures approx 8 inches in length now and I will begin my ribbed edging.

If you have made a beret/slouch you will need to decrease st’s over a couple of rows of plain dc rounds until you reach your fit, between 72 and 80 st’s for an adult size hat.

The decreases will be made in the reverse order as the increases, place a decrease where there was an increase.


MUST READ INSTRUCTIONS BELOW FOR CORRECT STITCH COUNT

I have counted each ch, sc and dc that I ended with, in row 15 of the pattern; I have 30 chain spaces, 30 sc and 20 dc, which add up to 80. Before I began the pattern rows, I had 80 st’s, and that is the exact amount of st’s I need to finish my hat edge with. If you had 64, 72, 80, 88 or 96 st’s you will get that stitch count by counting the same st’s as I did (each chain space, sc and dc).


Begin Simple Rib Hat Edge

The beginning ch 3 of each row is not counted as a stitch

Row 1, Ch 3, work 1 dc in same space as ch 3, work 1 dc in every dc, ch space and sc of the round (st count as per instructions)

Row 2, Ch 3, *work 1 dc in next dc, work 1 fpdc around the next dc,* repeat from *to* to end

Row 3, Repeat row 2, 1 more time or for length desired

I find that once I have finished my ribbed rows it can tend to curl slightly, so I work 1 more round of 1 hdc in each dc of the round then finish off and tie in ends.


Free Crochet Pattern Courtesy Of Cat Wood
Aka, Cats-Rockin-Crochet.
 2014.

You can sell your items made from this free crochet pattern
I’d love to see this pattern used for charity use
Please link back to this pattern if you use it

Sunday, February 9, 2014

Little Fans Down Under-Beanie Babe-Free Crochet Pattern


Little Fans-Down Under. Baby Beanie
Free Crochet Pattern
A decorative 20 row baby beanie
Matching sweater/cardigan now available, free crochet pattern
Matching booties now available, free crochet pattern
free baby bootie pattern

Introduction: With clever placements of the V stitch and 9 dc’s all in a row, a few sc’s and ch’s thrown in together, gives this pretty little stitch pattern a big tick. You will need a bit of concentration to begin with, but the pattern does repeat it’s self, so it will become repetitive.

To fit: Newborn to 3 Months
Measurements approx: Head Circumference 13 to 14 inches, hat height 5.5 to 6 inches

Please note, by using a smaller or larger hook, you can make a smaller or larger beanie

Hook size: 3.5mm for newborn 4.5mm for 3 months+ US G/6
Yarn: 8 ply approx 50 gm’s US DK/Medium.
I used, double knit Special, by Stylecraft
US crochet terms used
Skill level: beginner +
Tension: medium
Time: approx 2 hours

Stitches used:
Sl st=slip stitch
Ch=chain
Sc = single crochet
Hdc= half double crochet
Dc =double crochet
Fpdc=front post double crochet
V st= (dc, ch 1, dc)


V stitch: The V stitch is (1 dc, ch 1, 1 dc), worked into the st indicated by the pattern

 Please note! The beginning ch 1 and ch 2 of every rnd is not counted as a st.

BEGIN:
Chain 4, sl st to first ch to form a ring. Or use a magic ring.

Row 1, ch 1, work 12 hdc into ring, sl st to join in the 1st hdc (you will join this way on every round)

(Increase in every st)
Row 2, ch 1, work 2 hdc into each hdc to end, sl st to join (24 hdc)

(Increase in every 3rd st)
Row 3, ch 1, *work 1 hdc into the next 2 hdc, work 2 hdc into the next* repeat from *to* to end, sl st to join (32 hdc)

(Increase in every 4th st)
Row 4, ch 1, *work 1 hdc into the next 3 hdc, work 2 hdc into the next* repeat from *to* to end, sl st to join (40 hdc)

(Increase in every 5th st)
Row 5, ch 1, *work 1 hdc into the next 4 hdc, work 2 hdc into the next* repeat from *to* to end, sl st to join (48 hdc)

(Increase in every 6th st)
Row 6, ch 1, *work 1 hdc into the next 5 hdc, work 2 hdc into the next* repeat from *to* to end, sl st to join (56 hdc)

Row 7, ch 2, work 1 dc into same space as join,  work 1 dc in each st to end, sl st to join (56 dc)

Begin Pattern Rows
Row 1, Ch 1, work 1 sc in same space as join, skip 3 st’s, work 9 dc’s in next st, skip 3 st’s,
*work 1 sc in next st, skip 3 st’s, work 9 dc in next st, skip 3 st’s,*
  repeat from *to* to end, sl st to join in beginning sc, (7 sc, 7 groups of 9 dc)

Row 2, Ch 4, work 1 dc in same space as ch 4, ch 1, work 1 sc in the 4th, 5th and 6th dc of the 9 dc group, ch 1,
*work a V st (V st =1dc, ch1, 1dc) in the sc, ch 1, work 1 sc in the 4th, 5th and 6th dc of the 9 dc group, ch 1,*
  repeat from *to* to end, sl st into the space between the beginning ch 4 and 1 dc (7 groups of 3 sc, 7 V’s)

Row 3, Ch 3, work 4 dc in same space as join, skip 1 sc, work 1 sc in next sc,  
*work 9 dc in the V st space, skip 1 sc, work 1 sc in next sc,*
  repeat from *to* to end, work 4 dc in same space as the beginning (ch 3 and 4 dc) sl st into the top of the ch 3

Row 4, Ch 1, work 1 sc in same space as ch 1, work 1 sc in next dc, ch 1, work a V st in the next sc, ch 1,
*work 1 sc in the 4th, 5th and 6th dc of the 9 dc group, ch 1, work a V st in the next sc, ch 1*,  
repeat from *to* to end, skip 3 dc, work 1 sc  in 4th dc, sl st into the 1st sc of this round, (21 sc, 7 V st’s)

Row 5, Ch 1, work 1 sc in same space as join, work 9 dc in the V st space
*skip 1 sc, work 1 sc in next sc, work 9 dc in the V st space,* 
 repeat from *to* to end, sl st into the first sc of this round (7 sc, 7 groups of 9 dc)

Row 6, Repeat row 2, for a shorter hat finish here and go onto the hat edge rows. Measures approx 4.5 inches end of row 6.
Row 7, Repeat row 3
Row 8, Repeat row 4
Row 9, Repeat row 5
Row 10, Repeat row 2

For new born and using a 3.5mm hook and 8 ply yarn, your hat slightly stretched will be approx 5 inches in length.

Begin Hat Edge
You have 2 options here.
Stop the pattern repeats to make the simple ribbed edging below.
Or continue the pattern repeats and end with a 9dc group from the pattern, for a pretty scalloped edging, (Using pattern rows, 3, 4, 5)

Ribbed Hat Edge Instructions
Row 11, Ch 3, work 1 dc in same space as ch 3, work 1 dc in next dc, work 1 dc in next ch 1 space, work 1 dc in each of next 3 sc, *work 1 dc in next ch 1 space, work 1 dc in next dc, work 1 dc in next ch 1 space, work 1 dc in next dc, work 1 dc in next ch 1 space, work 1 dc in each of next 3 sc,* repeat from *to* to end, sl st into top of the ch 3 space (1 ch 3, 54 dc)

Row 12, Ch 3, *work 1 dc in next dc, work 1 fpdc around the next dc,* repeat from *to* to end (1 ch 3, 54 dc)

Row 13, Repeat row 12 and finish off, or continue for length desired.
My hat is now approx 6 inches in length


Free CrochetPattern Courtesy Of Cathy Wood
Aka, Cats-Rockin-Crochet.
 2014.

Chickie Magoo made this and supplied her instructions for making one to fit a 12 to 18 month old size.

I used Moda Vera "Sorbet" which recommends a 5mm or 5.5mm hook. I have average tension so I used a 5mm hook. I added 3 curlicues and a hand painted wooden button instead of a traditional flower.
 The mannequin is a 20" head circumference and this will fit a 12 to 18 month old I think. It's 7-3/4" high and 17" wide
 

  I did one more increase round than the pattern stated, other than that, I followed the pattern till the last 2 rows which I finished off with a row of SC then a simple picot row of *SC/ch3/SC into base of ch3, sc next 2* I'm glad you like my results!

Adult Version available, free crochet pattern


You can sell your items made from this free crochet pattern
I’d love to see this pattern used for charity use
Please link back to this pattern if you use it