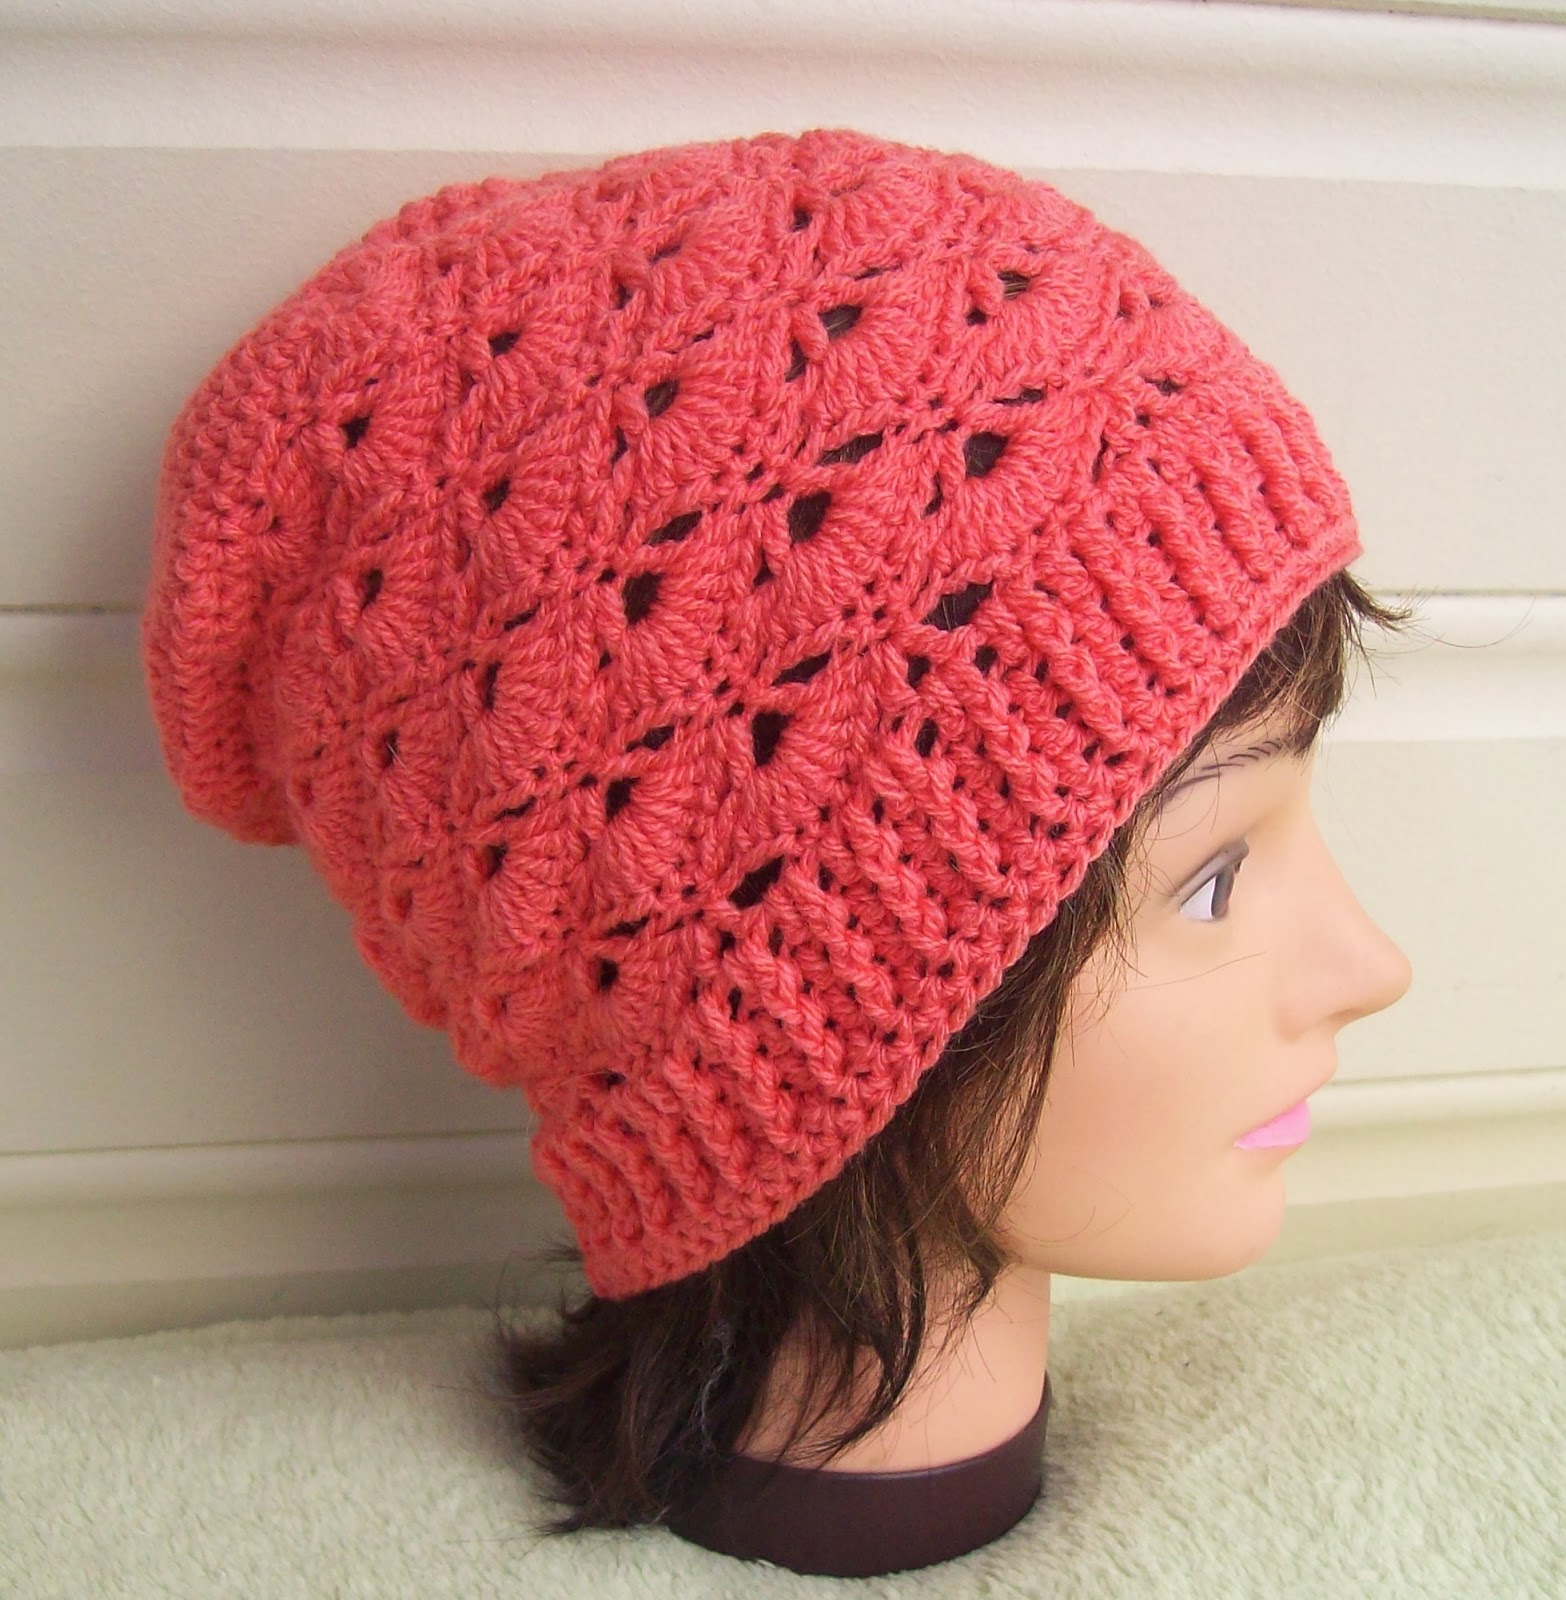
The Shy Butterfly-Baby Beanie-Free Crochet Pattern
A decorative 15 row baby beanie

Introduction: If you look
close enough you can see the butterflies hidden within the pattern, I think
they are quite shy as they seem to vanish, then reappear where they choose to.
The pattern is quite easy,
with lots of repeats.
I have made this pattern
with a dc crown, so it works up quite quickly, a real time saver and a quick
project for last minute gifts.


Measurements approx: Head Circumference
13 inches, hat height approx 5.5 inches
Please note, by using a smaller or larger hook, you
can make a smaller or larger beanie
Hook size: 4mm, US
G/6 (see introduction)
Yarn: 8 ply approx 50 gm’s US DK/Medium.
US crochet terms used
Skill level: beginner ++
Tension: medium
Time: approx 2 hours
Stitches
used:
Sl st=slip stitch
Ch=chain
Sc = single crochet
Hdc= half double crochet
Dc =double crochet
Fpdc=front post double crochet
Special stitch:
Cluster = a 2 dc cluster st. Yo hook, insert hook into st, pull up a loop, yo
and pull through 2 loops on hook (2 loops on hook), yo hook, insert hook into
same st and pull up a loop (4 loops on hook), yo hook and pull through 2 loops
on hook (3 loops on hook), yo hook and pull through all loops on hook. A 2 dc
cluster made.
Please note! Beginning ch 2 is not counted as a stitch.
Begin making crown:
Row 1, ch 3,
work 12 dc in 3rd ch from hook (or make magic ring, ch 2 and work 12
dc into magic ring) to join, sl st into the 1st dc of this round (12
dc)
Row 2, ch 2,
work 2 dc in same space as join, work 2 dc in each st to end of the round, to
join, sl st into the 1st dc of this round (24 dc)
Row 3, ch 2,
work 1 dc in same space as join, work 2 dc in next dc, *work 1 dc in next dc, work 2 dc in next dc*, repeat from *to* to
end, to join, sl st into the 1st dc of this round (36 dc)
Row 4, ch 2,
work 1 dc in same space as join, work 1 dc in next dc, work 2 dc in next dc, *work 1 dc in each of next 2 dc, work 2
dc in next dc*, repeat from *to* to end, to join, sl st into the 1st
dc of this round (48 dc)
My crown now measures approx 13 inches around-stop
increases.
Row 5, ch 2,
work 1 dc in each dc to end of the round, to join, sl st into the 1st
dc of this round (48 dc)
Begin
Pattern Rounds
Row 1, ch 1,
work 1 sc in same space as join, ch 3, skip 2 st’s, work 1 sc in next st, skip
2 st’s, work 7 dc in next st, skip 2 st’s, work 1 sc in next, ch 3, skip 2
st’s, *work 1 sc in next st, ch 3, skip
2 st’s, work 1 sc in next, skip 2 st’s, work 7 dc in next, skip 2 st’s, work 1
sc in next, ch 3, skip 2 st’s *, repeat from *to* to end, sl st into the 1st sc of this round
Tip for row 2, each group of 7 dc’s will have 1
cluster st worked into each dc. = 7 clusters.
Row 2, ch 1,
(work 1 sc, ch 2, 1sc), in same space as
join, ch 1, work a cluster in each of the next 3 dc’s, ch 2, work 1 cluster in
next dc, ch 2, work 1 cluster in each of the next 3 dc’s, ch 1, skip the ch 3, *work (1 sc, ch 2, 1 sc), in the next sc,
ch 1, work a cluster in each of the next 3 dc’s, ch 2, work 1 cluster in next
dc, ch 2, work 1 cluster in each of the next 3 dc’s, ch 1, skip the ch 3*, repeat
from *to* to end, sl st into the ch 2 space between the sc’s
Row 3, ch 4,
work 3 dc in same space as join, skip 1 cluster, work 1 sc in the next cluster,
ch 3, skip 1 cluster, work 1 sc in the next cluster, ch 3, skip 1 cluster, work
1 sc in the next cluster, *work 7 dc in ch
2 space between the next 2 sc’s, skip 1 cluster, work 1 sc in the next cluster,
ch 3, skip 1 cluster, work 1 sc in the next cluster, ch 3, skip 1 cluster, work
1 sc in the next cluster*, repeat from *to* to end, work 3 dc in the same
space as the first ch 4 and 3 dc, to join, sl st into the ch 3 space of the
beginning ch 4
Row 4, ch 5,
work 1 cluster in each of the next 3 dc’s, ch 1, skip the 3 chain, (work 1 sc,
ch 2, 1sc), in next sc, * work a cluster
in each of the next 3 dc’s, ch 2, work 1 cluster in next dc, ch 2, work 1
cluster in each of the next 3 dc’s, ch 1, skip the ch 3, work (1 sc, ch 2, 1
sc), in the next sc, ch 1, *repeat from *to* to end, work a cluster st in
the 1st, 2nd and 3rd dc of the previous round,
ch 2, sl st into the 3rd ch of the beginning ch 5
Row 5, ch 1,
work 1 sc in same space as join, ch 3, skip 1 cluster, work 1 sc in next
cluster, work 7 dc in the ch 2 space
between the next 2 sc’s, skip 1 cluster, work 1 sc in the next cluster, ch 3, *skip 1 cluster, work 1 sc in the next
cluster, ch 3, skip 1 cluster, work 1 sc in the next cluster, work 7 dc in the ch
2 space between the next 2 sc’s, skip 1 cluster, work 1 sc in the next cluster,
ch 3,* repeat from *to* to end, sl st into the 1st sc of this
round
Row 6, ch 1,
(work 1 sc, ch 2, 1sc), in same space as
join, ch 1, work a cluster in each of the next 3 dc’s, ch 2, work 1 cluster in
next dc, ch 2, work 1 cluster in each of the next 3 dc’s, ch 1, skip the ch 3, *work (1 sc, ch 2, 1 sc), in the next sc,
ch 1, work a cluster in each of the next 3 dc’s, ch 2, work 1 cluster in next
dc, ch 2, work 1 cluster in each of the next 3 dc’s, ch 1, skip the ch 3*, repeat
from *to* to end, sl st into the ch 2 space between the sc’s
Row 7,
repeat row 3
My hat is now approx 5
inches in length, I am going to stop the pattern sequence and add a rib edge.
If you like the look of the scallop edge, do a few more pattern rows for length
desired, finishing on a row with the 7 dc groups.

Begin Simple
Rib Hat Edge
Row 1, ch 2,
work 1 dc in same space as join, work 1 dc in each of the next 3 dc, work 2 dc
in the next ch space, work 1 dc in the sc, work 2 dc in the next ch space, *work 1 dc in each of the next 7 dc, work 2
dc in the next ch space, work 1 dc in the sc, work 2 dc in the next ch space*,
repeat from *to* to end, work 1 dc in each of the next 3 dc, sl to join in the
1st dc of this round, (48 dc)
Row 2, ch 2
work 1 dc in same space as join, work 1 fpdc around the next st, *work 1 dc in next st, work 1 fpdc around
the next st*, repeat from *to* to end, sl st to join, into 1st
dc of this round (48 dc)
Row 3,
repeat row 2, (you can also make your hat longer if you to choose to)
I like to finish my hats with 1 round of 1 hdc in each st to end, this
can prevent curling/stretching of the hat edge.
Row 4, ch 1,
work 1 hdc in each st to end, sl st to join in beginning hdc, tie off and sew
in ends

Free
Pattern Courtesy Of Cat Wood
Aka,
Cats-Rockin-Crochet.
2014.

You can sell your items made from this free crochet pattern
I’d love to see this pattern used for charity use
Please link back to this pattern if you use it
Google